A shower enclosure controls where water goes while providing a usable entrance. Its glass, moving parts, supports and seals work as an assembly. The useful questions are how it opens, how the glass is supported and how water returns to the tray—not simply whether the glass looks thick or the frame looks expensive.
Start with the enclosure form
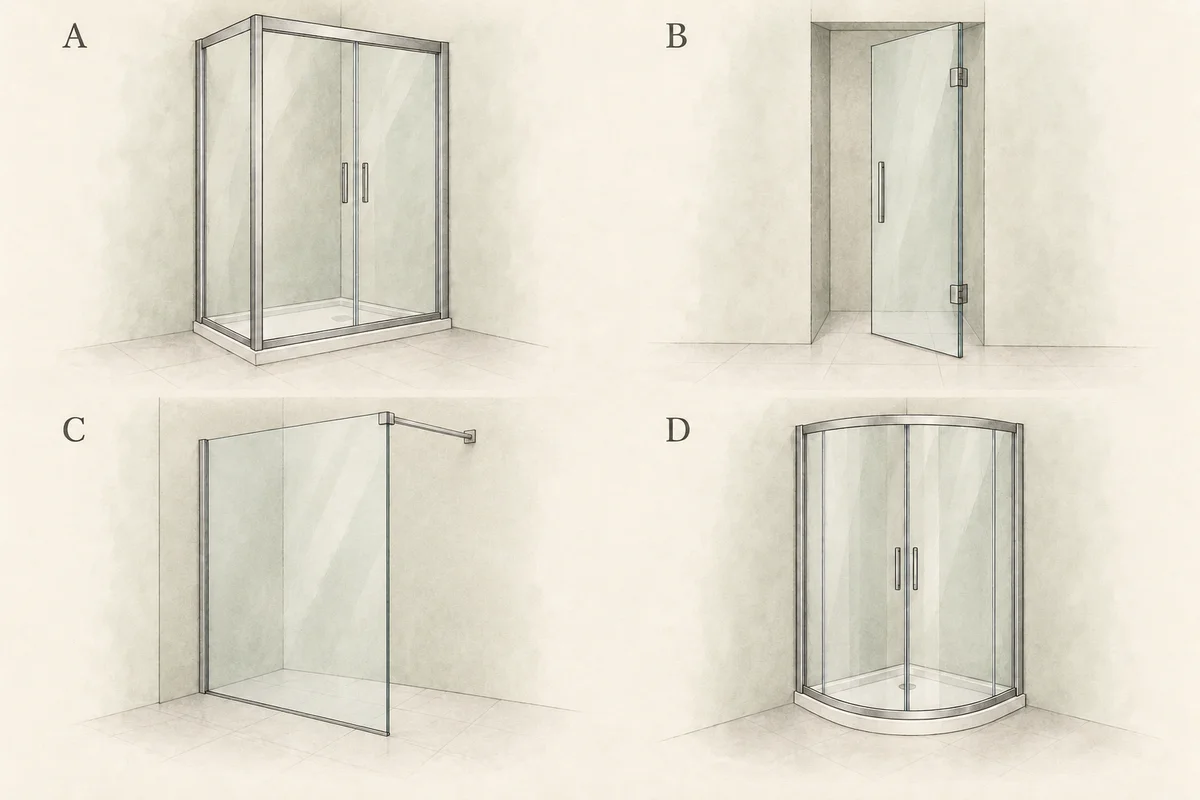
Illustration notes
AI-generated illustration. View larger image.
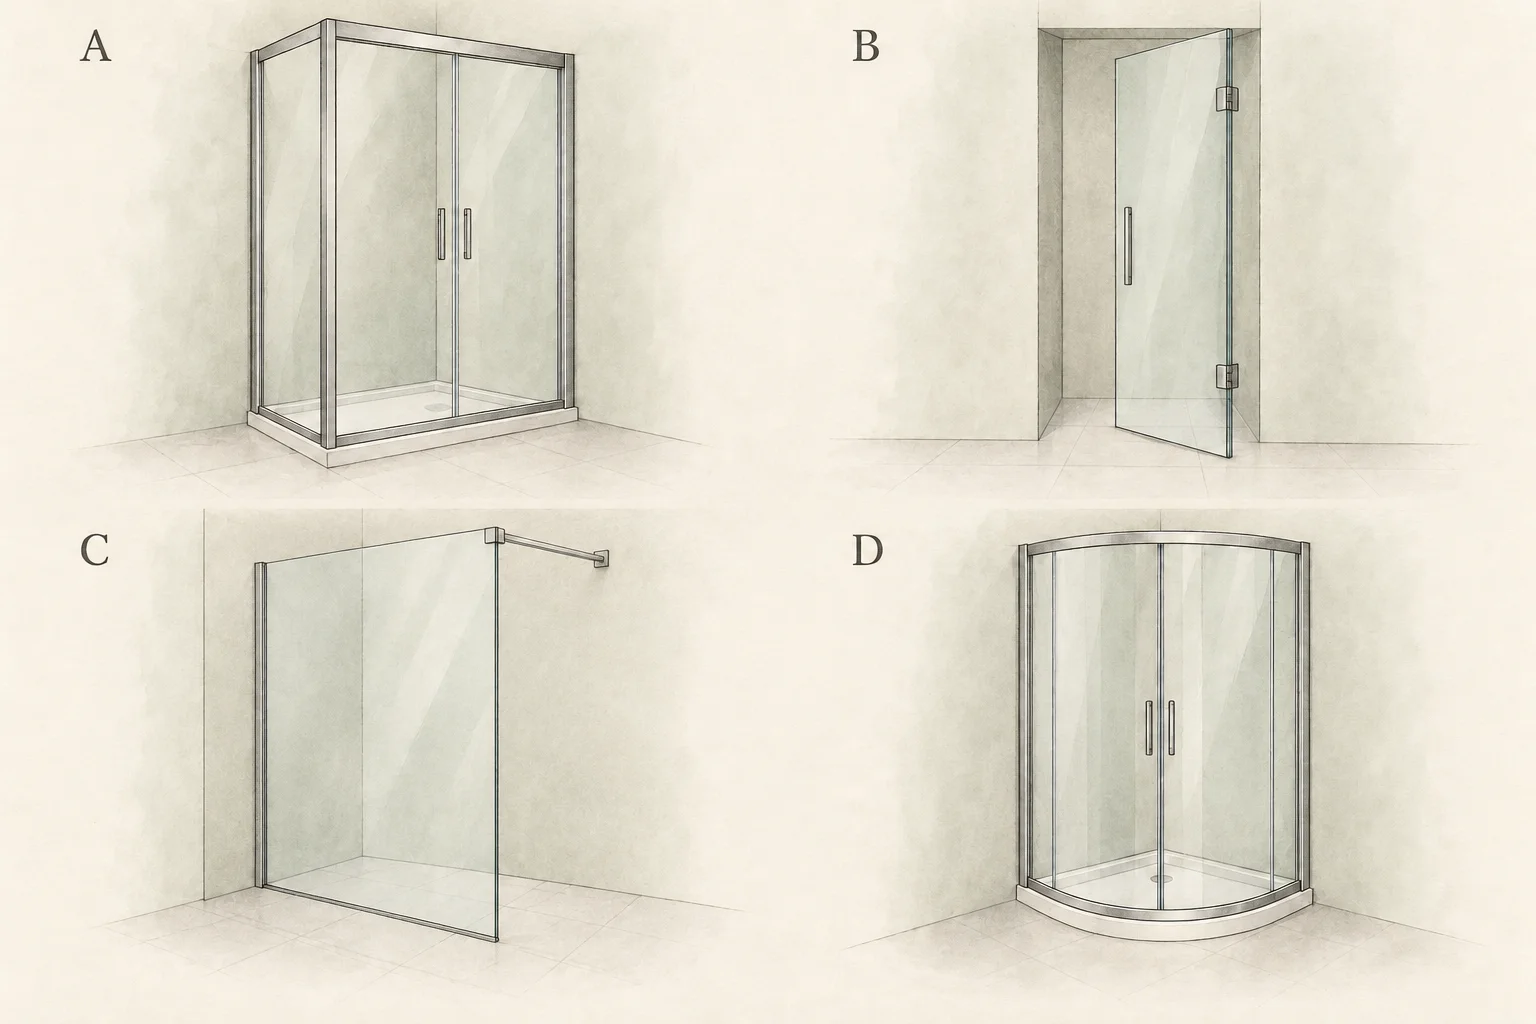
A recess door closes an opening between two walls. A corner enclosure usually combines a door with a side panel or two moving fronts. Quadrant and offset-quadrant enclosures follow curved tray fronts; they need a matching radius as well as the right wall-side dimensions. A walk-in screen has an open entrance rather than a complete door closure.
Framed glass sits within perimeter profiles. Semi-frameless arrangements retain some framing while leaving selected edges exposed. Frameless designs may use discrete hinges, clamps or channels; the word does not mean unsupported. The supporting wall, fixing substrate and stabilising arrangement remain important.
A return panel turns back from the main screen to reduce the open splash route. It may be fixed or hinged. An in-line panel continues along the same plane as a door. A side panel forms a return side of the enclosure. Roman's Haven6 range illustrates why compatible side and in-line panels belong to particular door systems. SCR01
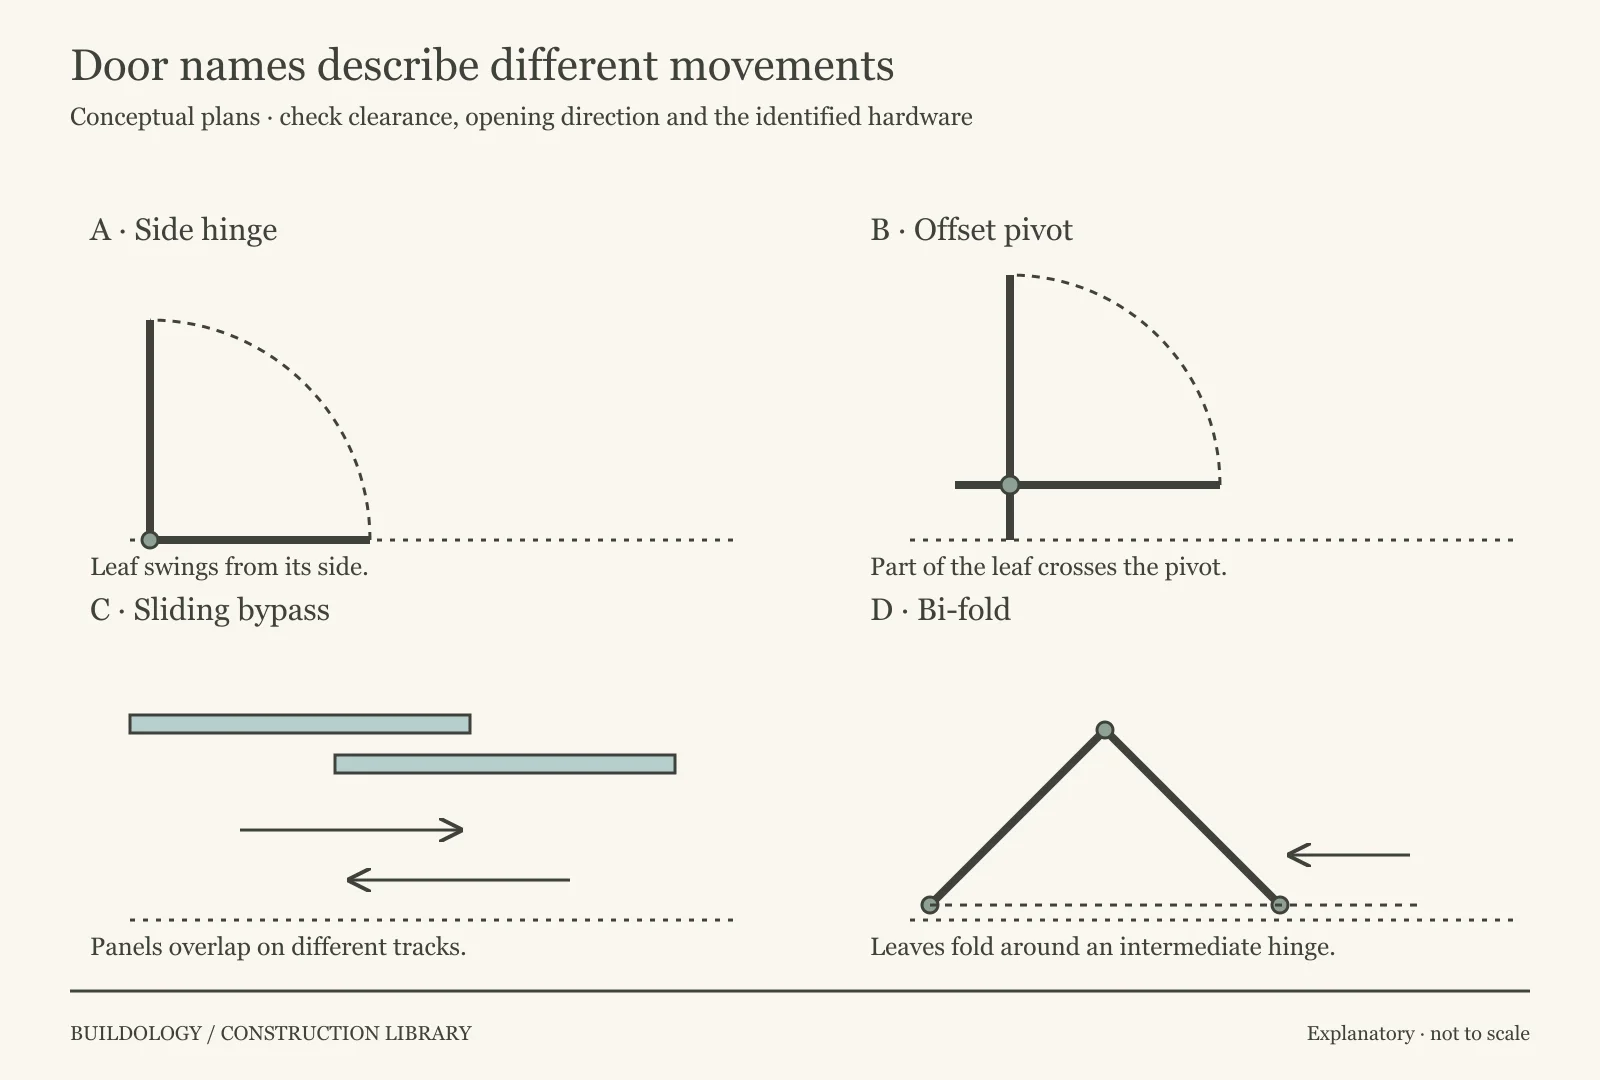
Compare the ways the door moves
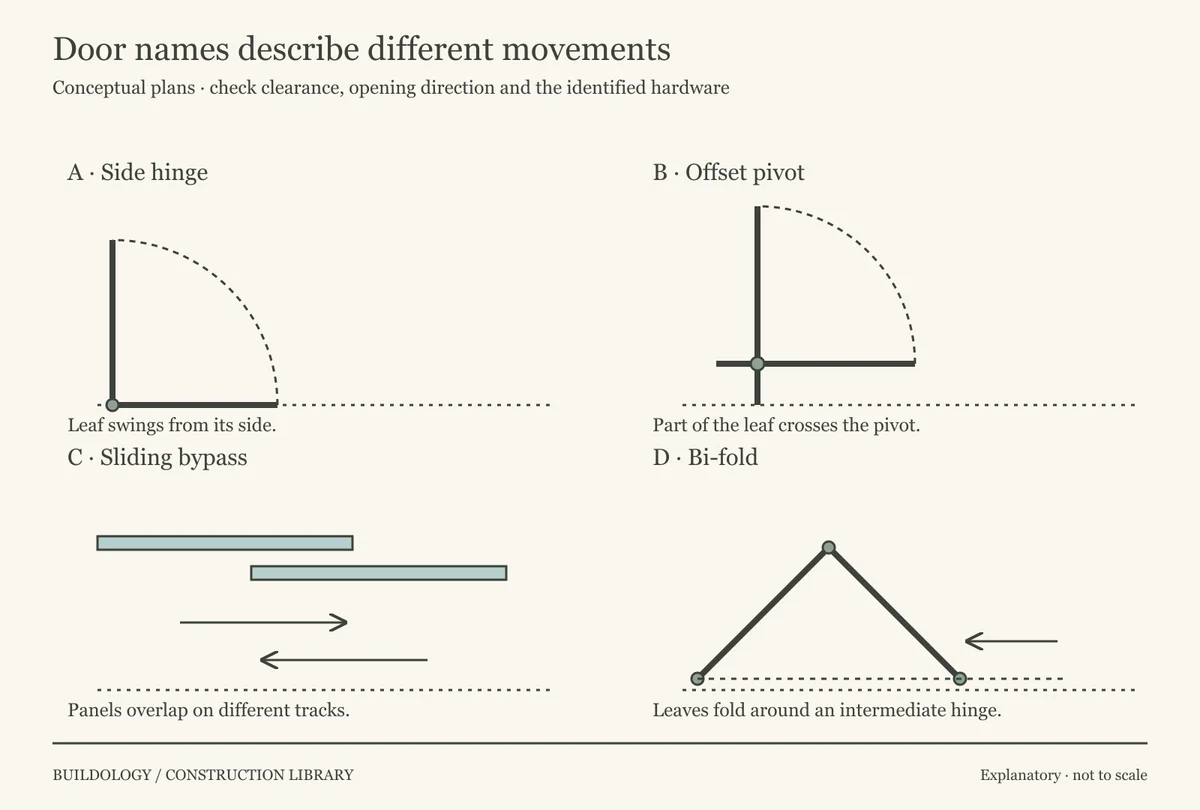
Illustration notes
Original explanatory diagram. View larger image.
| Operation | How it moves | What to consider |
|---|---|---|
| Side-hinged | Rotates about hinges near one edge | Swing space, handle collision, wall support and the direction of opening. |
| Pivot | Rotates about an axis set in from the edge | Part of the leaf may sweep inward as the larger part opens outward. |
| Sliding / bypass | One or more panels travel along a track | Overlap reduces the clear opening; rollers, guides and stops are system parts. |
| Bi-fold | Linked leaves fold towards one another | The folded stack occupies space and the hinges/seals need clearance. |
| Fixed walk-in | No door closes the entrance | Screen position, shower direction and the wet area beyond need coordinating. |
Do not equate nominal width with clear entry width. A 900-wide enclosure does not provide a 900-wide opening. Similarly, a sliding arrangement saves swing space but may restrict access. Use the actual product drawing when accessibility, assisted use or a confined room matters.
A door that drags may be misadjusted, but it may also be responding to a racked frame, a moving tray, a loose fixing or a worn roller. Adjustment should follow the cause. Forcing a stiff leaf or using its handle to support body weight is not a useful test.
Glass, edges and hardware
Clear, patterned, frosted, tinted and coated glass can all appear in bathroom products. Low-iron describes a reduced tint, not enhanced impact safety. Glass thickness is one component of the design; hinges, panel size, support and the tested assembly also matter.
Roman states that its enclosures and bath screens use toughened safety glass and are tested as enclosure products. This is evidence about its range, not every unmarked screen. Product declarations and identification are more useful than assuming that all clear glass is the same. SCR02
Toughened glass is processed to its required shape before toughening. It must not be drilled, trimmed or notched afterwards to make replacement hardware fit. The Glass and Glazing Federation explains this processing restriction. Its 2017 leaflet's historic list of regulations is not used here as a current compliance schedule. SCR03
A visible chip at an edge, cracked glass, missing restraint or loose hinge needs prompt specialist assessment and restricted use. “Safety glass” does not mean unbreakable. Do not try to tighten an unidentified clamp until the correct gasket, fastener and torque requirements are known.
Replacement rollers and seals need more than an approximate diameter or colour. Check the track profile, hole position, glass thickness, seal fin direction and the exact model. A magnet strip and a bottom sweep do different jobs; an ill-fitting substitute can prevent closure or divert water outside.
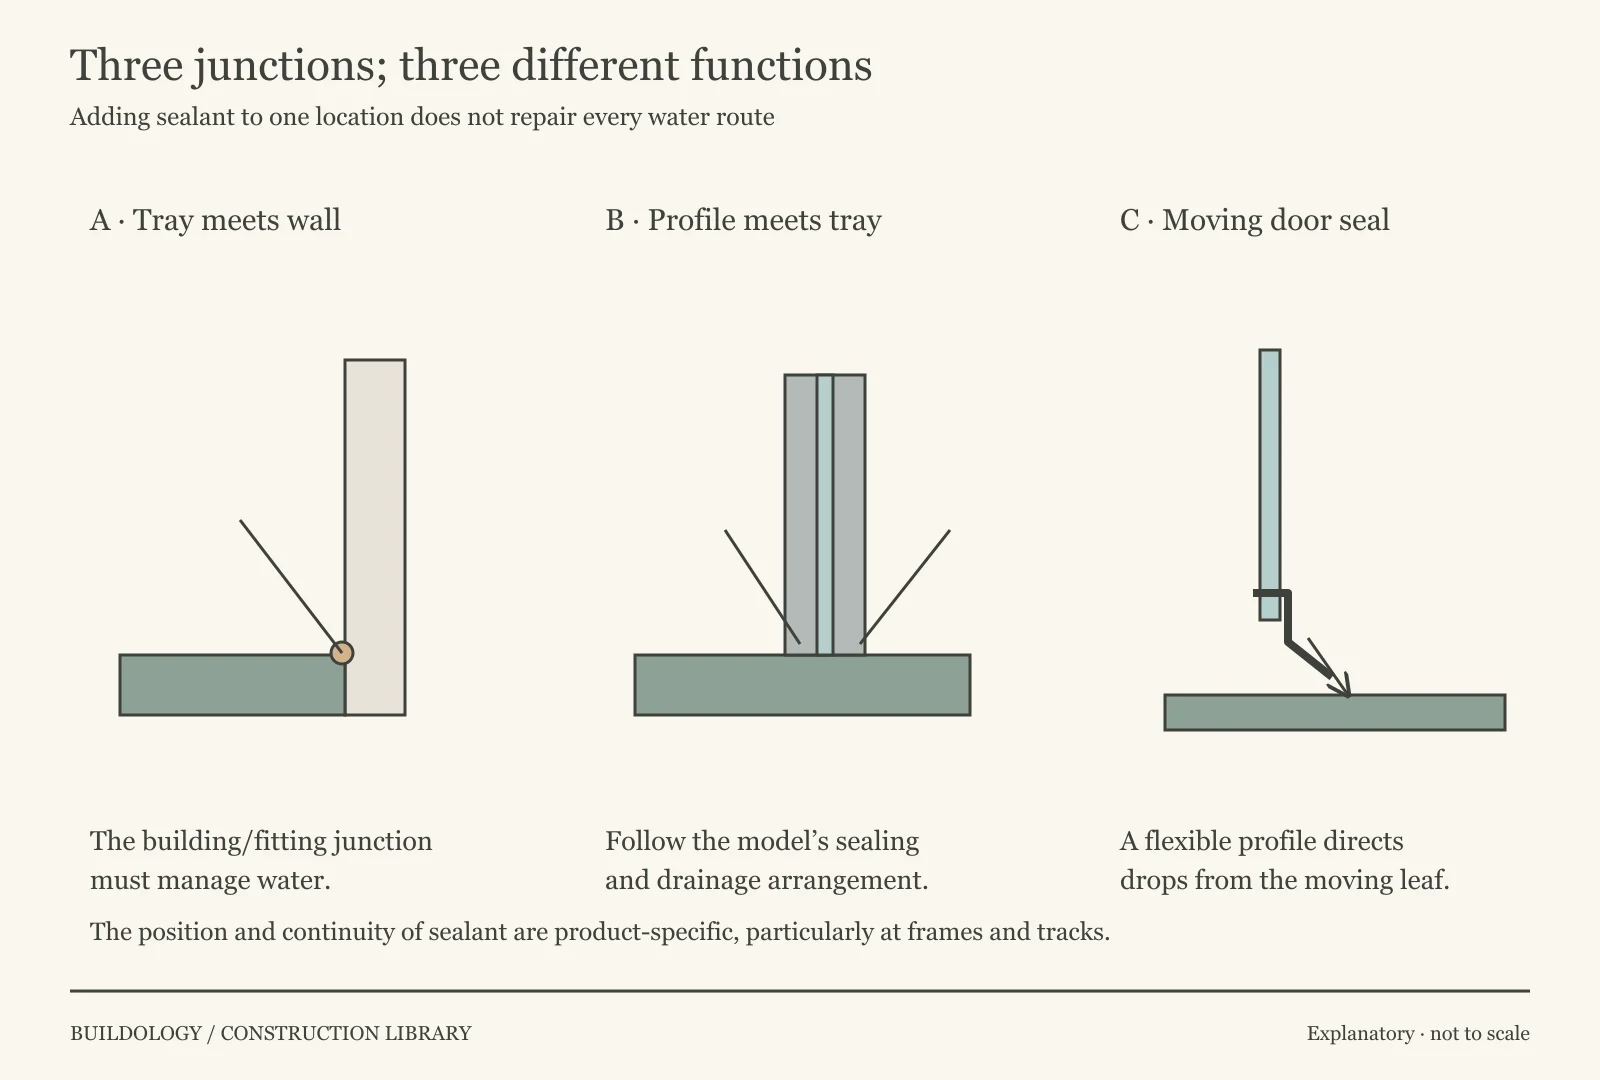
Three water junctions that are easily confused
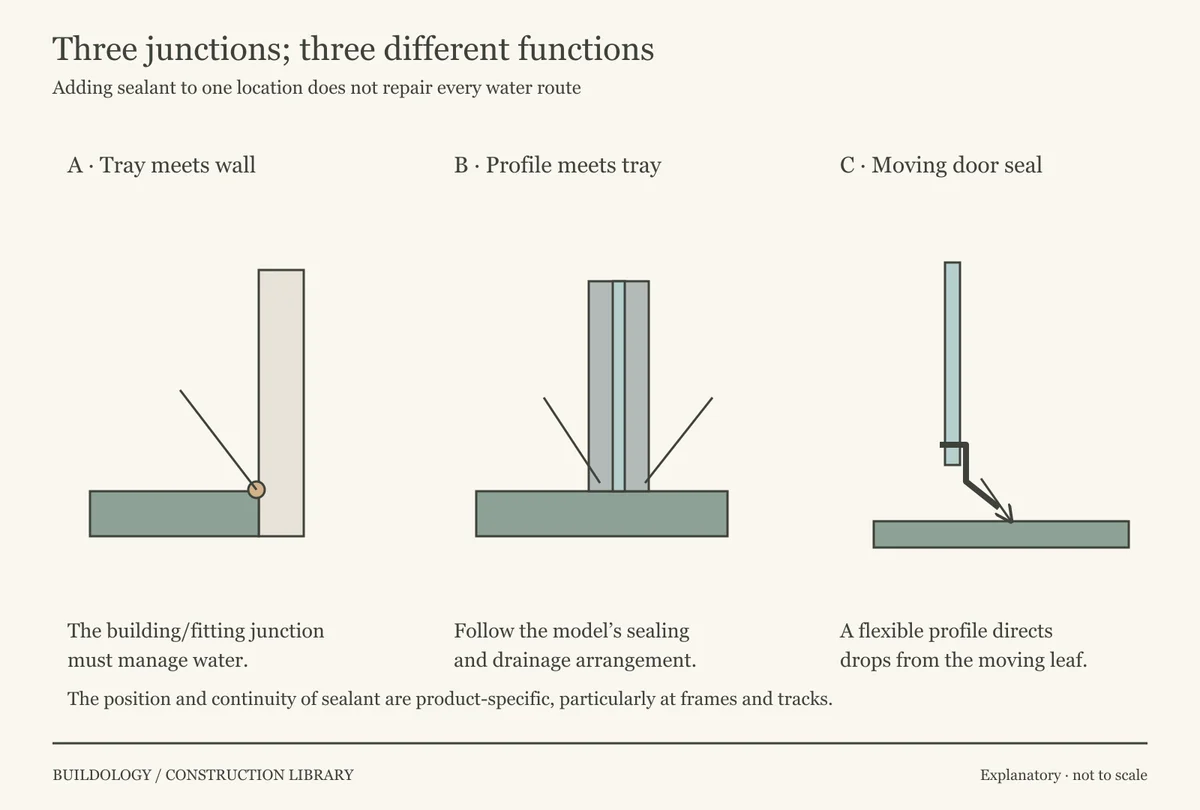
Illustration notes
Original explanatory diagram. View larger image.
The wall and tray
The tray-to-wall junction must be completed appropriately before the enclosure obscures access. It is separate from waterproofing behind tiles and from the later seal around a metal profile. MERLYN's installation guidance makes that sequence explicit. SCR04
The frame and tray
Some frames are designed to collect water internally and return it to the shower side. Sealing every visible gap can obstruct a designed path. The common instruction “silicone only outside” is also too crude: different parts of one enclosure may have different requirements.
For example, MERLYN Series 8 one-door/offset-quadrant instructions specify inside sealing at the wall-profile/wall junction while keeping the inside tray junction unsealed; the bottom rail is sealed on the outside. Use that as a reason to find the exact model's diagram, not as the sealing recipe for an unrelated enclosure. SCR05
The moving leaf
A door seal may wipe against the tray, overlap fixed glass or meet a magnetic closure. Its profile and direction determine where droplets fall. A warped, split or missing seal can leak even where the wall junction is sound. Replacing silicone around the wall cannot repair a worn moving seal.
In England, Approved Document K is the relevant Building Regulations guidance for protection against impact involving glazing where the work and location fall within its scope. Identify the applicable requirements for the project; a glass thickness or a product test reference alone does not establish building compliance. Other UK nations have their own guidance.
Bath screens and open shower areas
A bath screen rests above a bath rim, which may curve or slope differently from a tray. Hinged, fixed, folding and multi-panel forms exist. The screen's bottom seal needs the rim geometry intended by the maker; a larger bead on an unsuitable rim is not a designed water barrier.
Carron's shower-bath screens are matched to particular forms, including P-shaped products. A screen should also suit the showering position and its movement clear taps, handles and the bath edge. SCR06
An open walk-in shower is not a sealed box. Water can pass through its entrance or beyond the end of a screen. Consider shower direction, floor falls, drainage and the wider waterproofed zone together. A screen on an unprotected level floor does not create a wet room. See baths and shower trays and wall tiling for those adjacent assemblies.
A grab rail is a separately designed support. Do not assume a screen stabiliser, towel bar or door handle can serve that purpose. Where a layout is intended to be accessible, assess it against the actual user and relevant design brief rather than the marketing term “walk-in”.
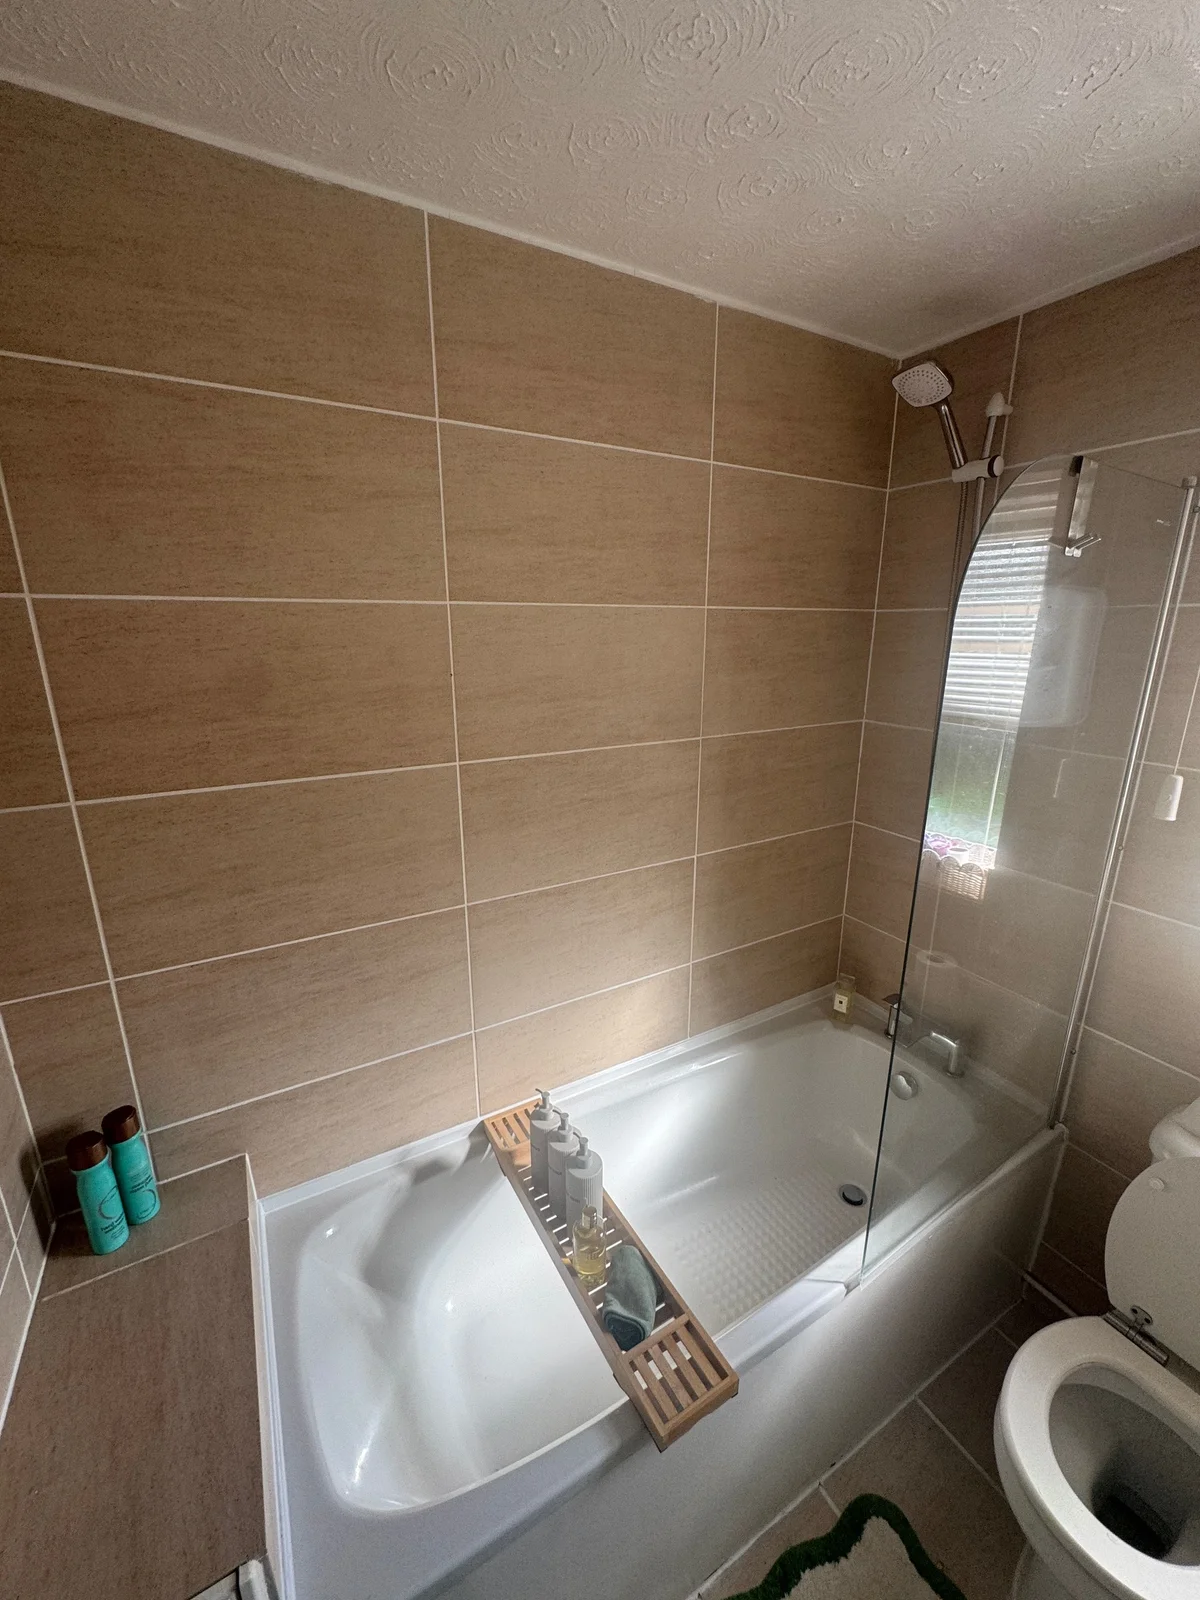
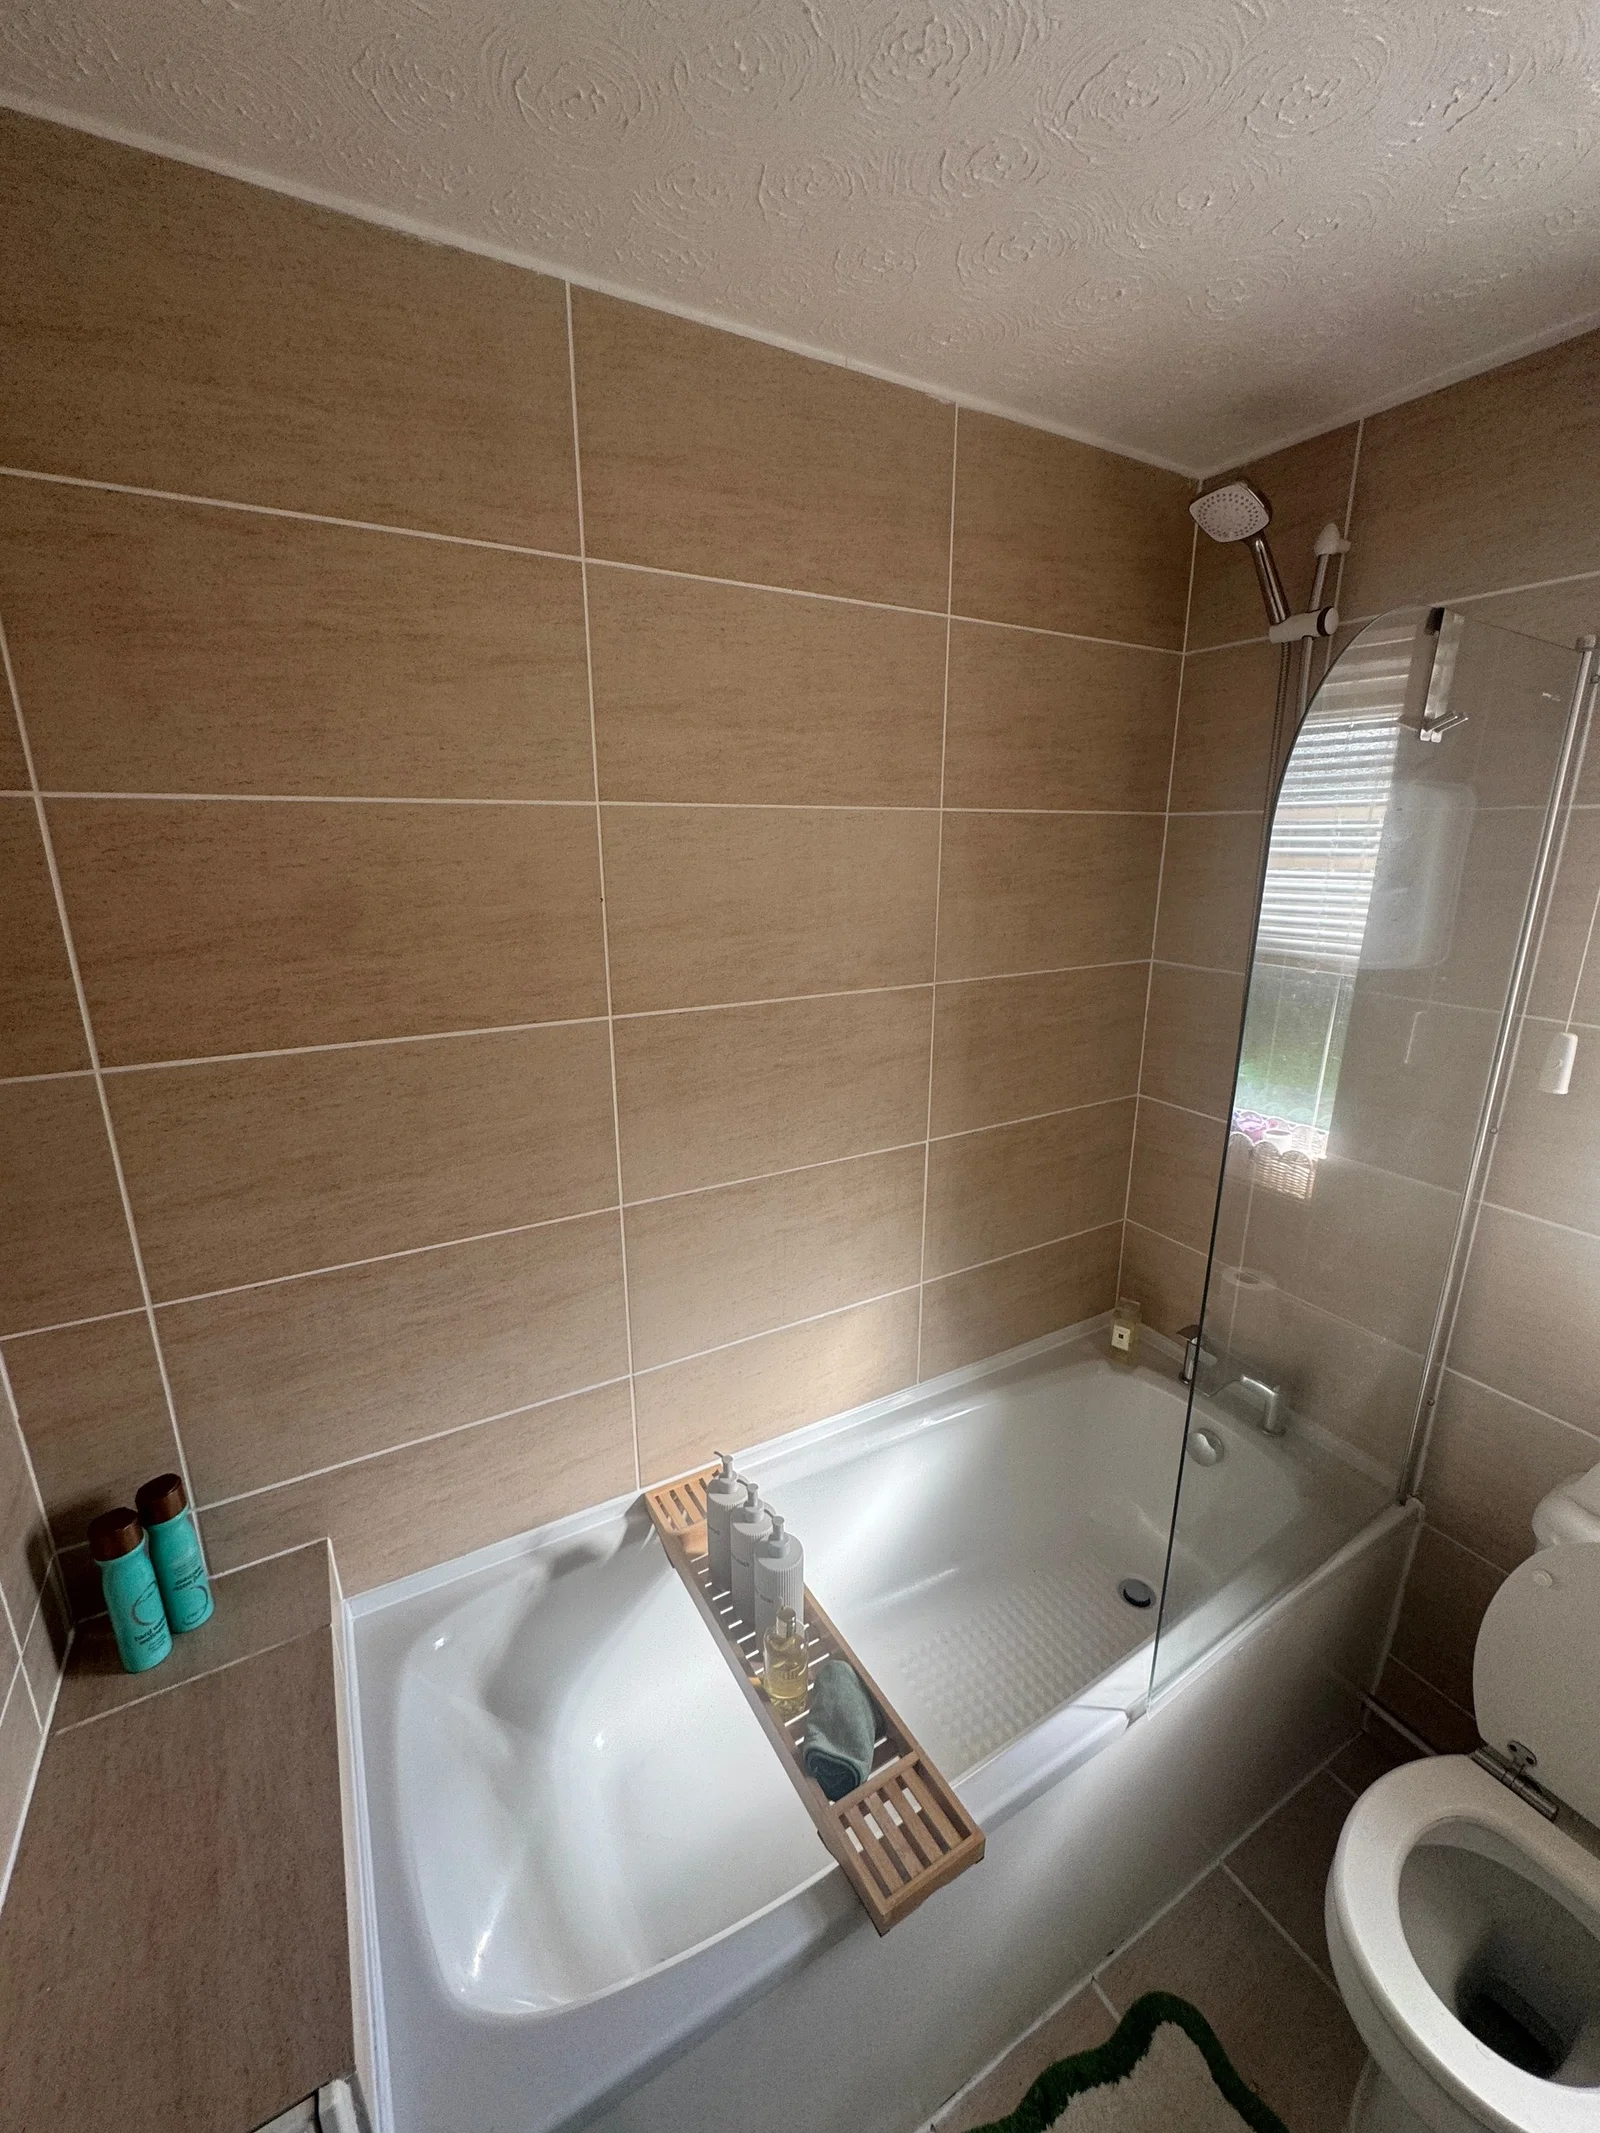
The screen meets a bath rim rather than a shower tray. Trace the wall connection, glass edge and bottom seal as separate junctions; the photograph illustrates the arrangement without testing its water containment.
Survey archive photograph · View larger image
Measure the finished opening and diagnose the route
Measure the opening where the product will sit, at more than one height. Wall plumb, tray level, tile thickness and adjustment ranges can change the fit. A nominal tray dimension taken before tiling is not necessarily the finished enclosure opening. MERLYN's troubleshooting instructions distinguish those checks from roller and seal adjustment. SCR05
For an existing leak, locate the first visible water and relate it to use. Water appearing only when a jet hits a door joint suggests a different route from water below the tray during drainage. Concealed migration can blur that pattern, so state what was actually seen. Controlled specialist testing may be useful; soaking every joint at once often makes the result less informative.
| Finding | Investigate before deciding on repair |
|---|---|
| Water beneath a wall profile | Tray/wall seal, profile joints, fixing penetrations and the specified sealing arrangement. |
| Wet floor beside the opening | Door overlap, seal direction, shower aim and entrance splash. |
| Door drops or rubs | Rollers/hinges, restraints, fixing substrate and frame/tray movement. |
| Persistent staining under the tray | Waste connection and concealed perimeter routes, not just the glass. |
Why did more silicone make no difference?
Hypothetical example SCR-01. Water appears outside a framed shower. Sealant has been added along both faces of the bottom rail. The moving door seal is split and the enclosure model has not been identified.
Choose the next useful check
Identify the assembly. Obtain its sealing and drainage diagram before removing or adding material. An inside rail bead may be inappropriate for this model, but that cannot be decided from a rule of thumb.
Separate the visible defects. The split moving seal has its own function and may need a model-compatible replacement. It is not repaired by a wall bead.
Verify the water route. Check support and alignment, restore the specified components and junctions, then test proportionately. A leak does not automatically justify new glass or a complete enclosure.