A joint connects pieces; a scribe makes an edge fit its neighbour. Understanding that difference helps explain why a skirting corner opens, why a cabinet filler looks uneven, and why a neatly filled crack may still need a joinery repair.
This guide concerns ordinary internal finishing and furniture joinery. Structural timber connections and tested fire-door assemblies need their own design. For profiles and materials, start with internal joinery profiles.
Learn what the joint is doing
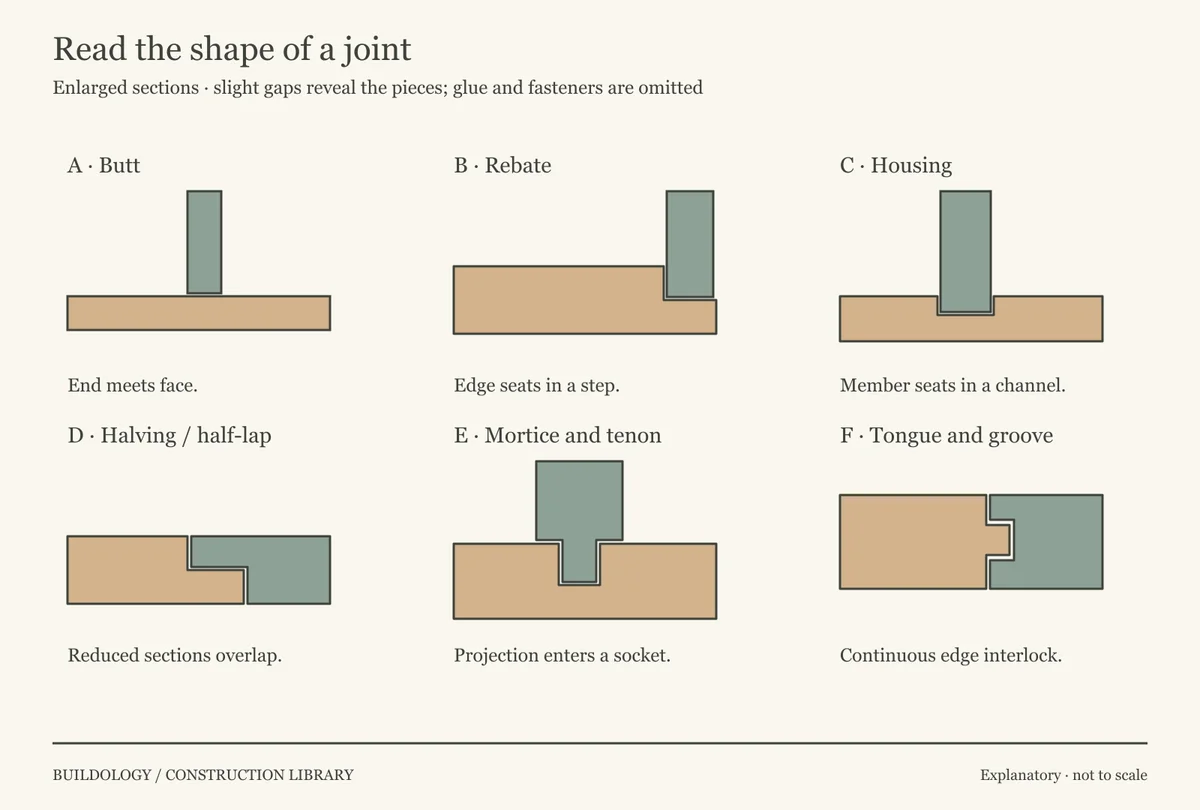
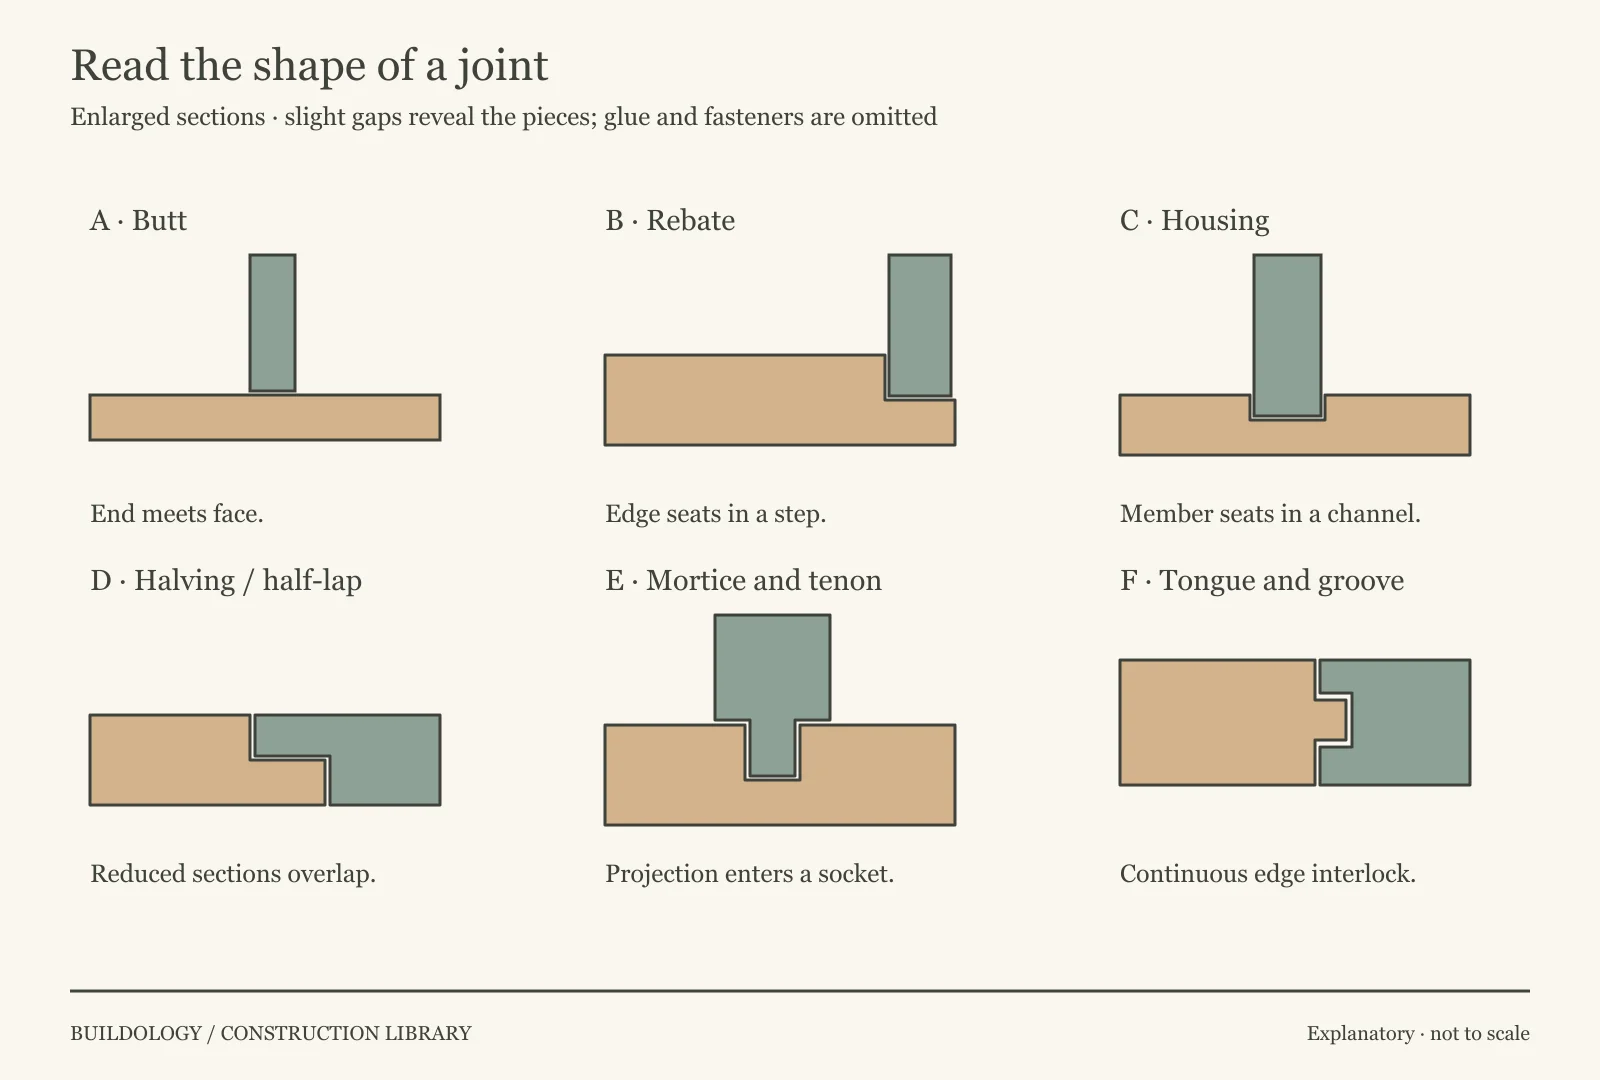
Illustration notes
Original explanatory diagram. View larger image.
| Joint | Basic form | Familiar use or distinction |
|---|---|---|
| Butt | One piece meets the face or end of another | Simple junction; fixings or other reinforcement may be concealed. |
| Rebate | A step receives an adjoining edge | Common at backs and frames. |
| Housing | A channel receives the end or edge of a member | Locates a shelf or partition. |
| Halving / half-lap | Reduced sections overlap | Members can meet with flush faces. |
| Mortice and tenon | A projection enters a matching socket | Often found in framed joinery. |
| Tongue and groove | A continuous tongue enters an edge groove | Aligns adjoining boards. |
These names describe geometry. Axminster's furniture-joint guide illustrates these families alongside dovetails, bridles and finger joints. None is automatically suitable merely because its name sounds stronger. JNT01
A dowel is a round inserted peg; a biscuit is a thin oval insert in matching slots. A loose tenon is a separate shaped member fitted into mortices in both pieces, rather than an integral projection on one piece. These can assist location or form part of an engineered connection, but glue, material, size and loading still govern the result. JNT02, JNT03
A dovetail uses flared tails and matching sockets; a finger or box joint uses a repeated square interlock. A scarf joins lengths with an extended shaped or sloping overlap. Seeing a scarf in trim does not make that detail suitable for repairing a roof timber.
Mitres: a change in direction
A mitre joins angled ends. At a square corner between matching members, equal cuts are commonly 45 degrees. That is a consequence of a 90-degree corner, not a setting for every room. An out-of-square wall junction or bay needs its actual angle and the chosen joint arrangement considered.
Mitres can carry a moulding around an external corner or join the head and sides of an architrave. They align the profile across the change in direction, so matching height and projection matter as well as the cut angle. Skirtings R Us describes these common applications and contrasts mitred and scribed internal corners. JNT04
An open outside corner may result from short pieces, mismatched profiles, inaccurate cuts, poor restraint or later movement. Filling the face can disguise the gap without bringing the two profiles into alignment. Look at the joint from above as well as from the room.
Corner blocks, plinth blocks and square-headed trim provide alternative junctions. They can be deliberate design choices rather than failed attempts at mitres. Identify the intended style before proposing a different arrangement.
Scribed internal corners
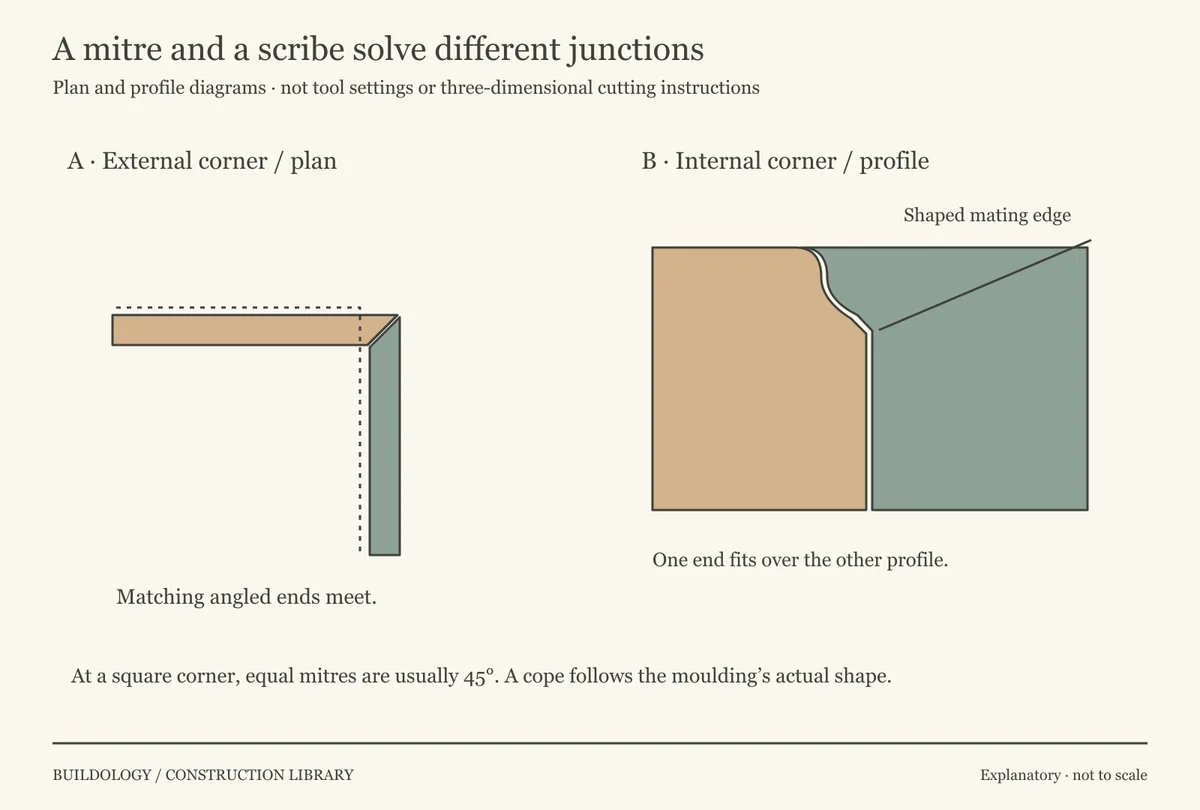
Illustration notes
Original explanatory diagram. View larger image.
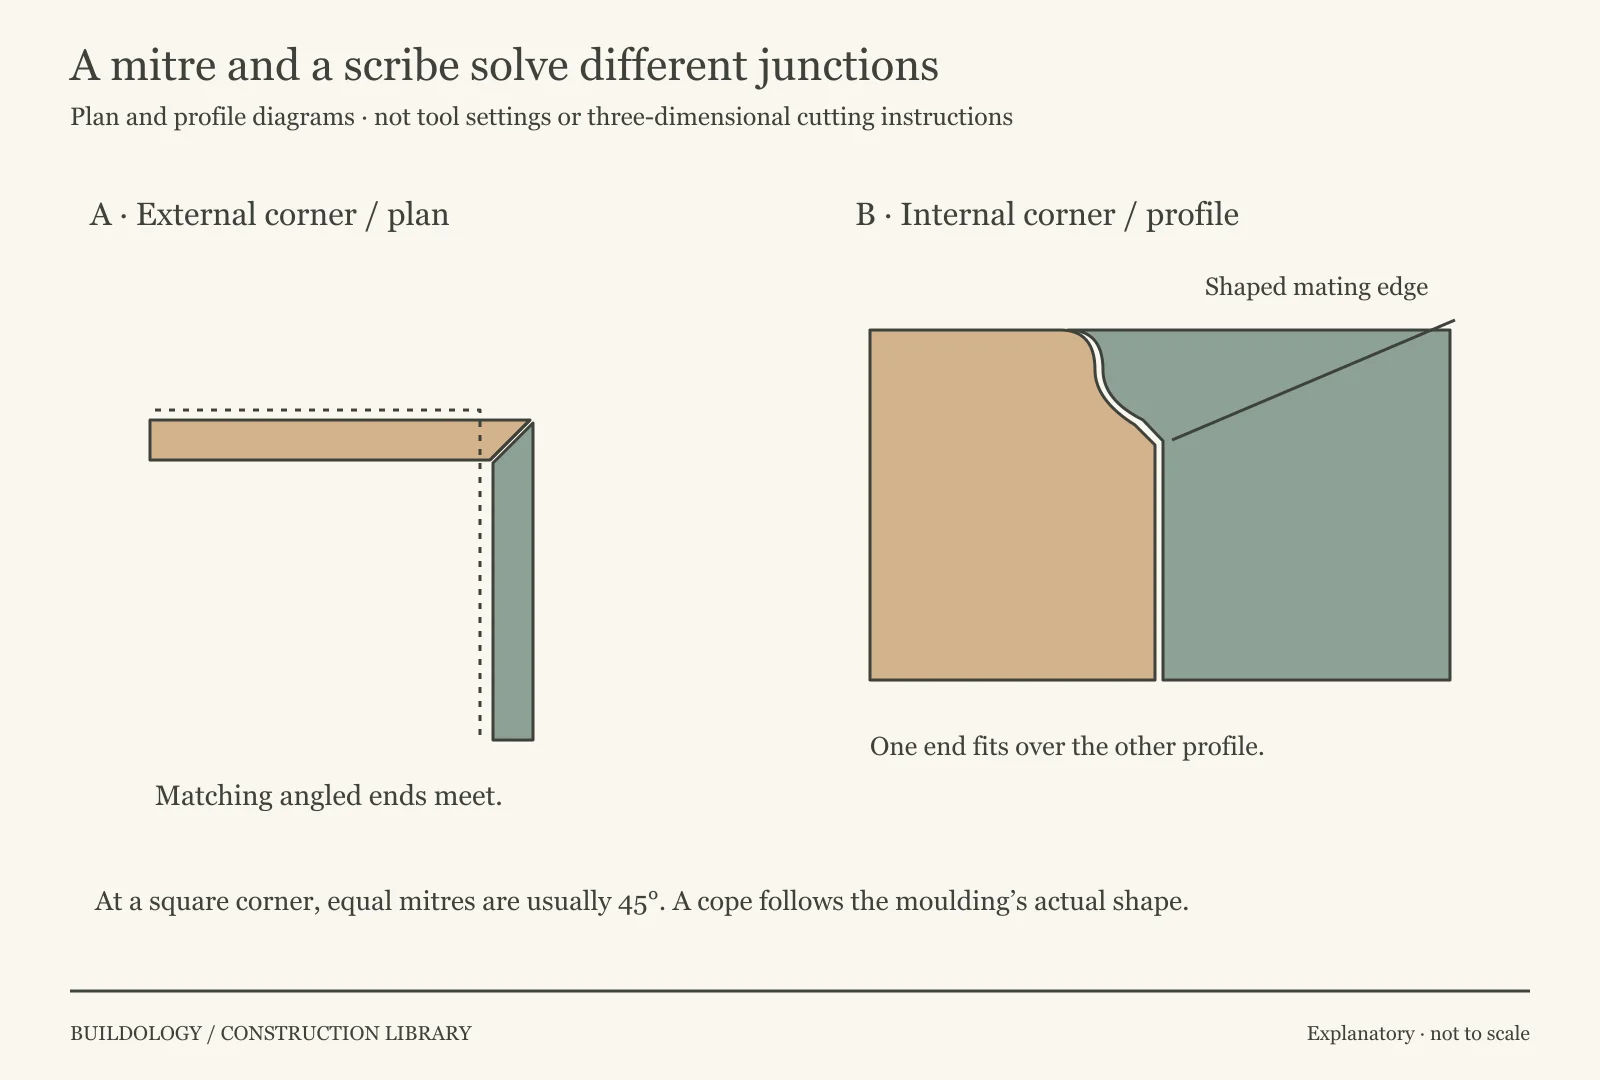
For a traditional scribed internal skirting corner, one board runs into the corner and the adjoining board's end is shaped to fit over its moulded face. This is also called coping. It differs from cutting both pieces into an internal mitre.
A mitre cut can expose the profile line used when preparing the cope, but the finished joint is not simply that mitre left in place. Material is removed behind the visible edge so the shaped end can meet the face. Metres Direct explains the distinction and the need to fit the actual profile. JNT05
The result still depends on compatible mouldings, careful fitting and secure boards. A scribe does not make different torus profiles identical, conceal a large height discrepancy or eliminate timber movement. Close inspection of the profile is more useful than asking only whether the installer used a coping saw.
Where original joinery is to be retained, a small local repair may preserve more material and a better visual match than replacing a complete run. The feasibility depends on sound material, access, finish and the ability to recreate the section.
Scribing to an uneven wall
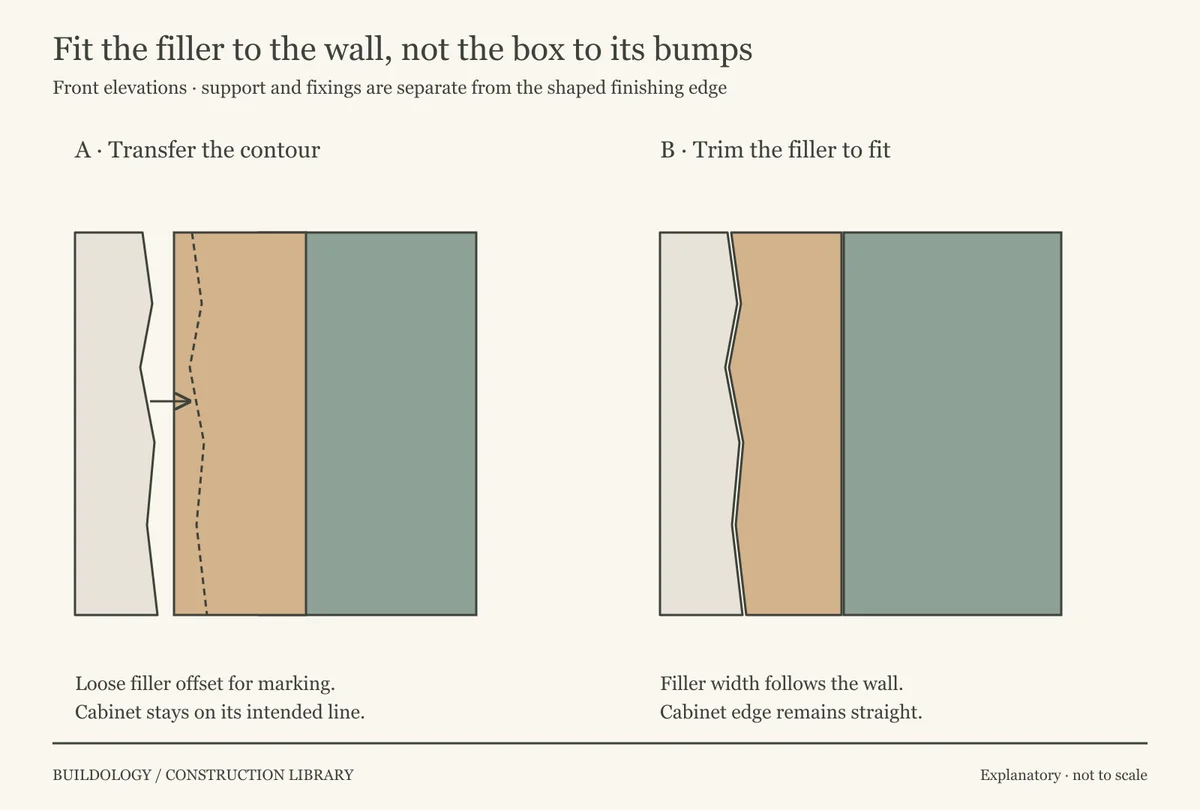
Illustration notes
Original explanatory diagram. View larger image.
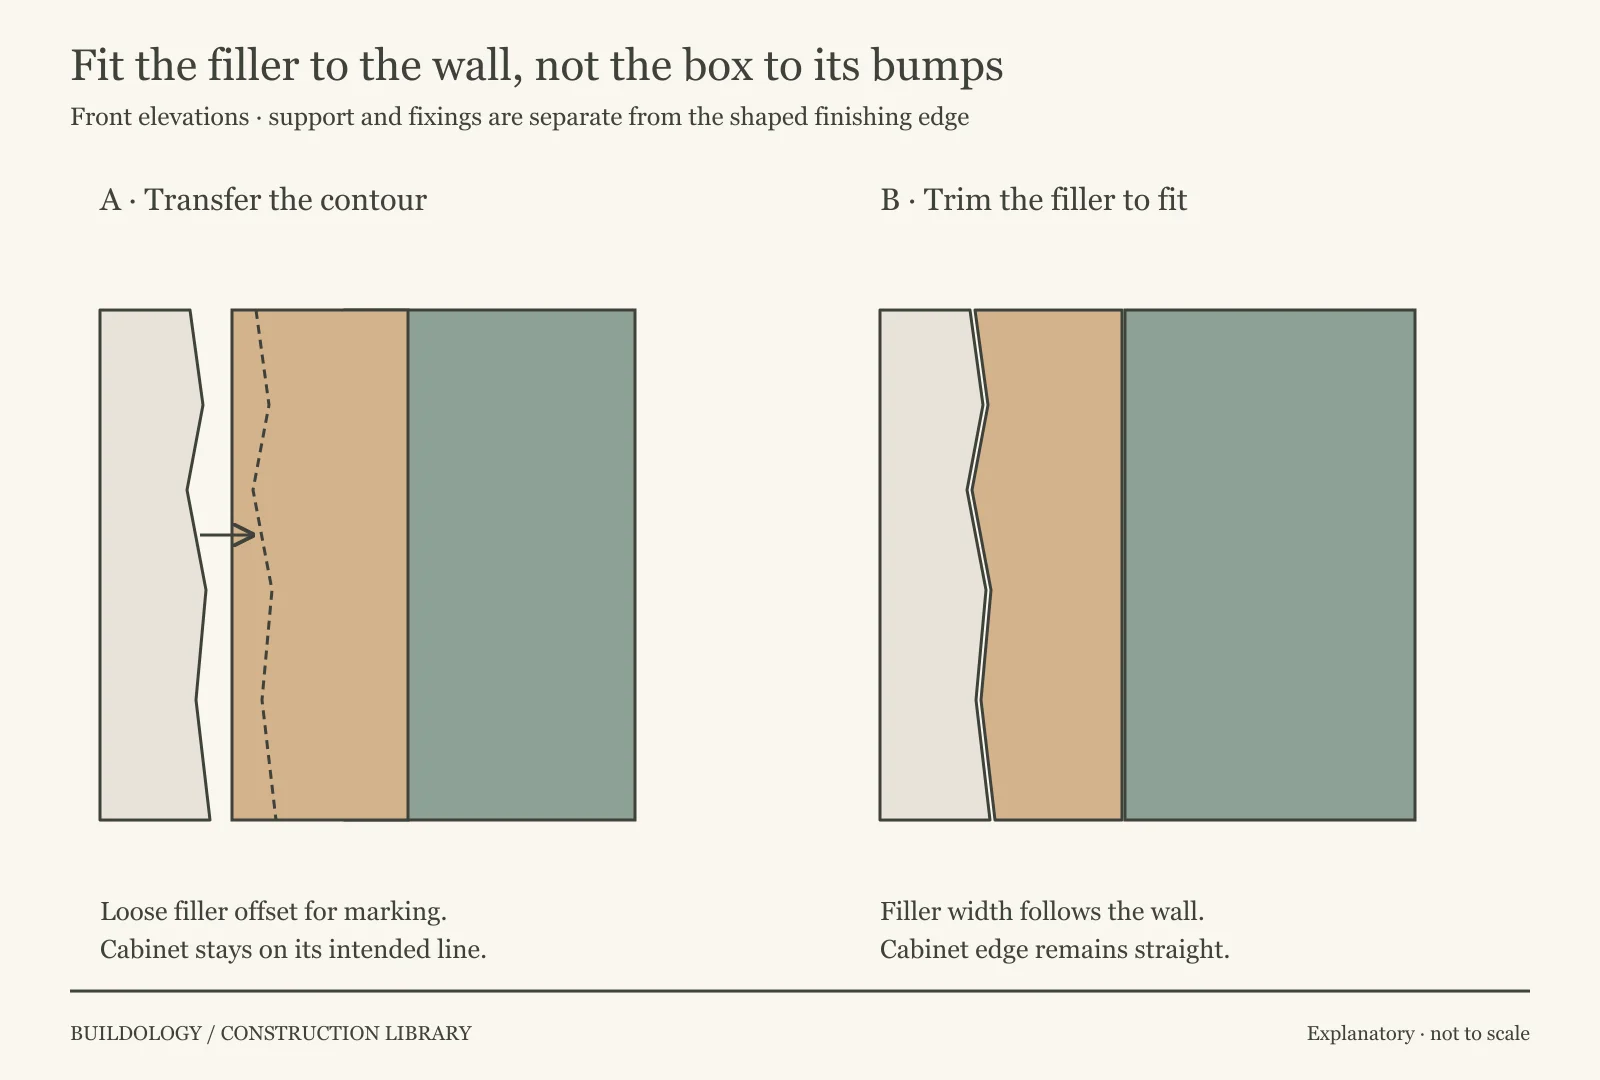
A wall scribe fits a panel, end or filler to an irregular surface. The cabinet is positioned to its intended line and the wall contour is transferred to the piece that will be trimmed. The finished filler can vary in width because the wall varies; that alone is not poor workmanship.
Do not use the wall as the only datum when the cabinet needs to remain level and plumb. Forcing a square box to follow a bowed wall can rack it, disturb door gaps or load fixings unevenly. The filler should close the residual shape, while suitable supports and fixings do their own jobs.
Packing supports or spaces an assembly behind its face. Scribing shapes its visible edge. Caulking closes a suitable small finishing joint. Those operations solve different problems. A deep unsupported gap filled with caulk does not become a fitted timber edge or a load-bearing packer.
See fitted wardrobes and storage for cabinet fillers and fitted kitchens for appliance and door clearances that must survive the fitting process.
Materials and movement change the detail
Solid timber changes dimension with moisture conditions. A broad panel needs a movement strategy; tightly restraining it across its width can create problems as conditions change. Worktop Express's timber instructions provide one practical example of movement allowances and slotted fixings, but those details are not a universal joinery specification. JNT06
A framed solid-timber panel may be intended to move within its grooves. Gluing every panel edge during a repair can alter that behaviour. A routed MDF front only looks similar; it does not contain the same moving panel joint. Establish what is actually present before deciding how to close a gap.
Board cores also affect repair. A screw withdrawn from damaged chipboard may leave a weakened hole. A split solid-timber edge, a crushed MDF corner and delaminated plywood are different substrates. More adhesive or a larger screw is not a universal repair method.
Joint appearance can reflect a finish failure rather than separation of the underlying connection. A fine paint line at an otherwise stable joint differs from a loose member that moves under gentle use. Describe both the visible opening and the observed movement, without forcing every crack into a structural explanation.
Read common defects proportionately
| Finding | Useful distinction | Implication |
|---|---|---|
| External mitre opens at the toe | Angle, length, profile alignment and restraint | A cosmetic fill may not correct the geometry. |
| Internal corner has a ragged edge | Poor cope, incompatible profile or later damage | Compare the two sections before replacing a whole run. |
| Cabinet filler varies in width | Irregular wall versus an out-of-plumb cabinet | Check the cabinet line; taper can be intentional. |
| Frame joint moves | Failed connection, damaged member or loose fixing | Restore an adequate connection before refinishing. |
| Panel splits or bows | Material, restraint, moisture and support | Identify construction and environment; appearance alone does not prove one cause. |
| Dark or softened timber | Surface staining versus material deterioration | Investigate the moisture route and soundness before specifying a splice. |
A practical repair description identifies the member, joint, material, defect and intended retained finish. “Make good joinery” leaves too much unanswered. Conversely, a tiny isolated paint crack need not trigger dismantling sound work.
Matching new trim requires the full section: height, projection, curves, fillets and any rebate. Two products both sold as ogee can meet badly at a corner. Include the end treatment and return detail where the new work terminates.
Know when ordinary trim advice stops
Work to a fire-door frame, stop, seal groove or rated wall junction can affect a tested assembly. Use the identified doorset and supporting evidence rather than treating it as decorative joinery. The internal doors, frames and ironmongery guide explains those distinctions.
Before sanding or stripping old paint, consider hazardous coatings. HSE identifies lead exposure during refurbishment of older painted surfaces and describes suitable control measures. Dust-producing preparation is a separate risk from observing an intact painted skirting. JNT07
The mitre is closed, but the moulding still does not meet
Hypothetical example JNT-01. A short skirting replacement meets an older run at an external corner. Both pieces touch, but their curves step past one another. They were ordered under the same general profile name.
Separate profile from cut angle
Compare the sections. Check height, projection and each curve. A shared name does not establish an identical moulding.
Check the corner geometry. Even correctly matched profiles need cuts and positioning suited to the actual corner. Changing the mitre angle alone cannot make two different sections coincide.
Choose the smallest coherent repair. A matching replacement section or carefully designed transition may retain the sound run. Filling the step is unlikely to reproduce a crisp, consistent profile. Record the intended appearance as well as the fixing and finishing work.